Nested Virtualization referes to running a virtualization platform (such as Proxmox) inside a VPS (Virtualization within Virtualization) and in order to employ this feature, you can do the followings:
Note: In this article we are given two public IPv4s (194.5.98.68 and 194.5.98.74). Our goal is to assign 194.5.98.68 to the Proxmox serve itself and 194.5.98.74 to the VM created with Proxmox.
1. The first and most important step is to ensure that the Virtualization capability (VT-x or AMD-V) is available to the OS on the server.
Note: This feature is not enabled by default on the servers. To enable that, send a ticket.
2. After the Virtualization capability has been exposed to your server by us, we can start installing Proxmox using the custom ISO installation method.
3. Go to the Proxmox Virtual Environment download page and choose the latest Proxmox VE ISO Installer via copying its ISO link.

4. Now go to the Control Panel for the management of your server which is available at manage.webhorizon.net
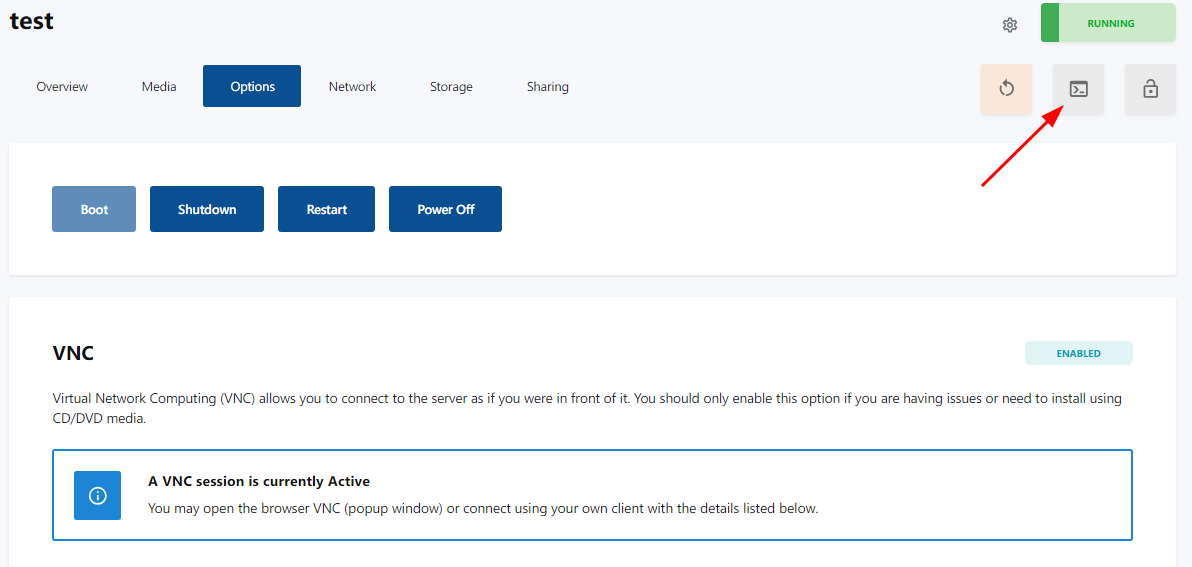
5. You need to enable VNC in order to have graphical access to you server. Go to the Options tab and as shown bellow, click on Enable VNC Access.

6. After a while, the VNC button will appear on the top right corner. Click on it so that you can have access to your server.
7. Next you need to mount the custom ISO using its direct link. Click on the Media tab and then Custom CD/DVD.

8. Before going any further, you should change the boot order of the server such that it prioritizes the boot from the CD/DVD (custom ISO). For doing that, as shown bellow, choose CD/DVD and then click Apply.

9. Now you can enter the direct ISO link of Proxmox and then click on the Insert button.

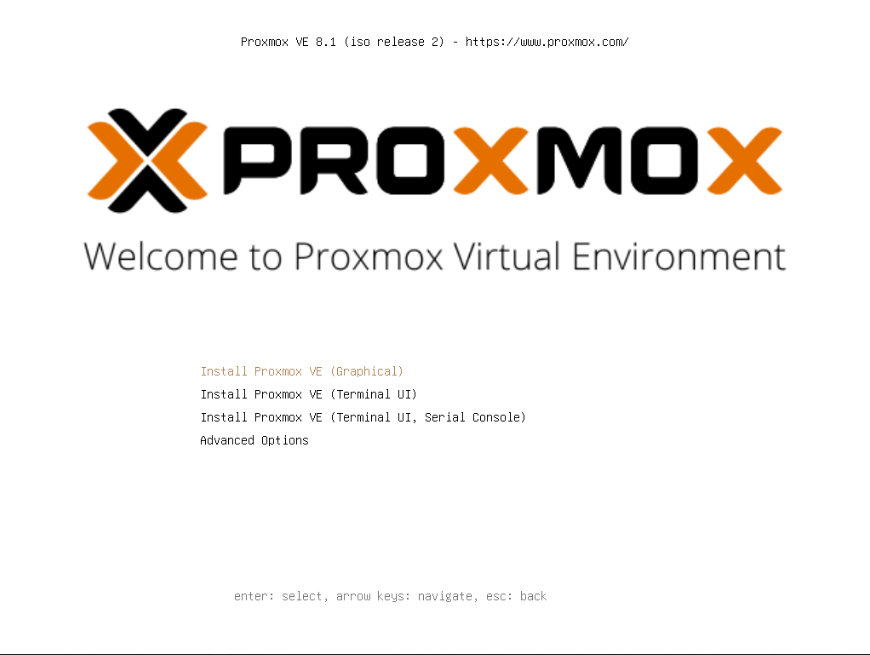
10. The image will be mounted and you can Restart your server so that it boots from the custom ISO and after a while, you can see the installation page of Proxmox in VNC window.
11. Select Install Proxmox VE (Graphical) and press Enter.
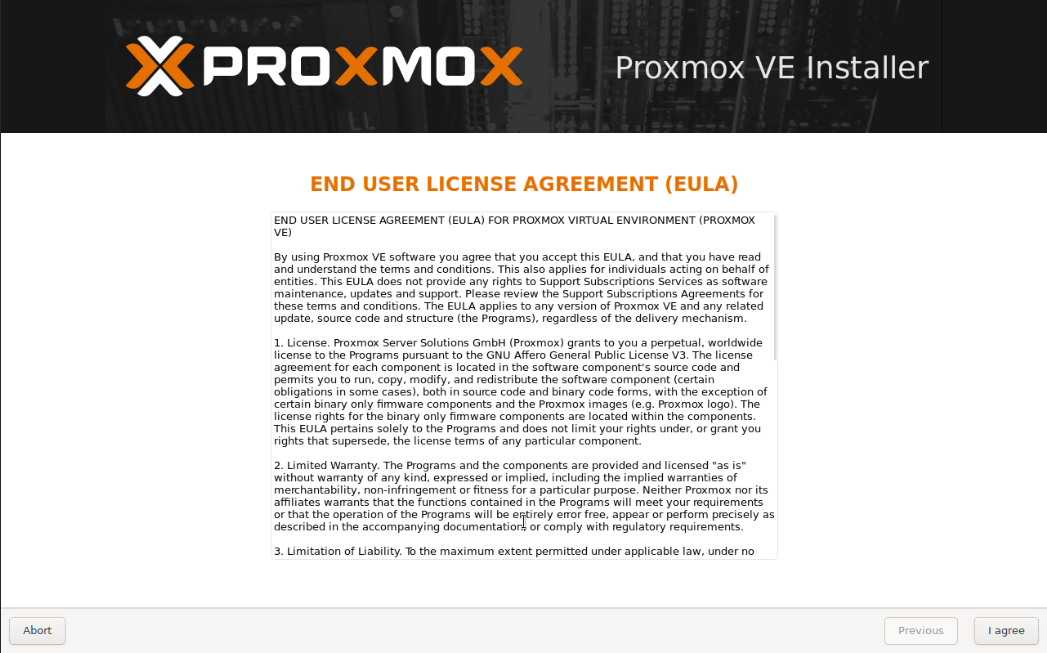
12. Accept the EULA by clicking on I agree.
13. In the next page you can choose which disk you want Proxmox to be installed on (if you have more than one) and click Next.

14. In the next page you can set the country, time zone and keyboard layout and then click Next.

15. In the next page, you are asked to provide the password for the root user of Proxmox which will be the password for the root user of OS itself too and also enter your email address and click Next.

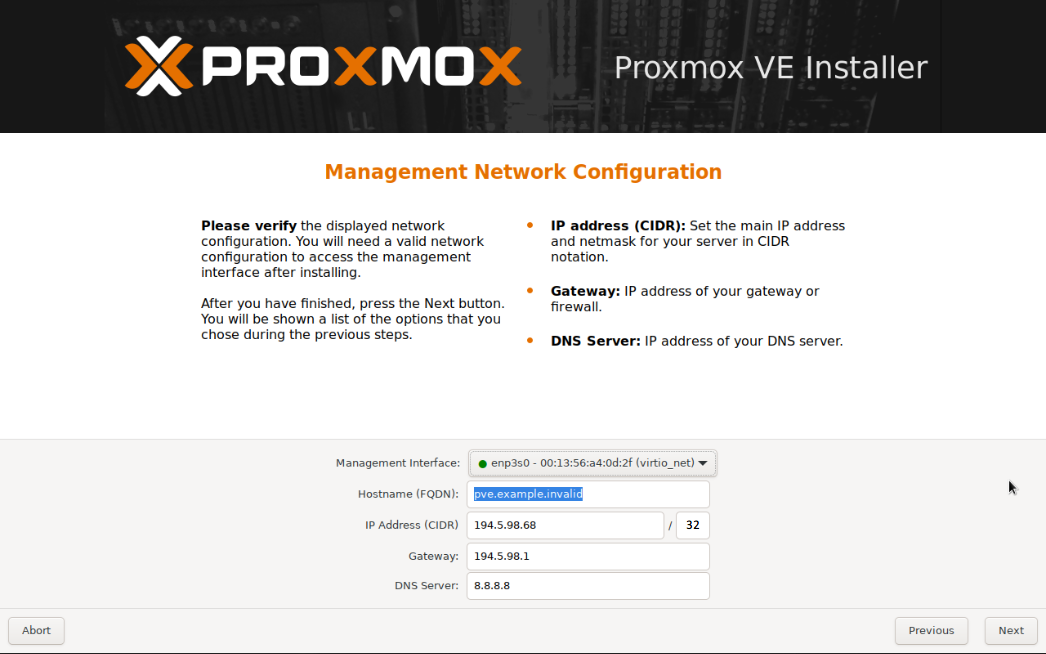
16. In the next page, we should enter our first public IPv4 (194.5.98.68) and its subnet, the gateway (194.5.98.1) and also the address of the DNS server that we want to use (8.8.8.8) and click Next to continue.
Note: Pay attention to the name that Proxmox has assigned to the network interface (in this case enp3s0)
17. In the Summery page, we are presented with all the information that we have provided and if all are OK, click Install.

18. When installation finishes, the server will be rebooted and after a while, the following screen can be seen in VNC window which shows the address through which you can access the web interface of Proxmox.

19. Open a browser and go to the link provided in the previous step. Username is root and Password is whatever you have set during the installation process.

20. After a successful login, you can access the web interface of Proxmox.

21. Before going any further and creating the VMs, we need to edit the network configuration of Proxmox based on our needs. You can log in into the underlying OS in VNC window or SSH into the machine.

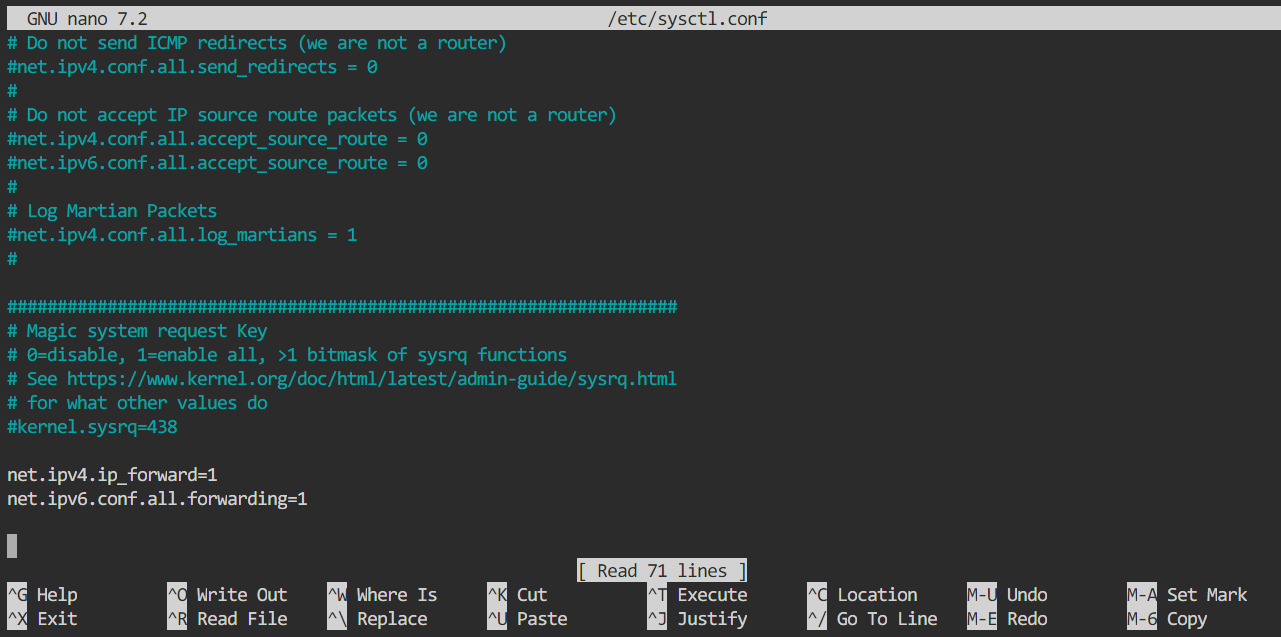
22. First we need to enable IP Forwarding via editing the /etc/sysctl.conf. Run nano /etc/sysctl.conf and add the following lines to the end of the file.
net.ipv4.ip_forward=1
net.ipv6.conf.all.forwarding=1
23. Press Ctrl + S to save and Ctrl + X to exit from nano.
24. Next run sysctl -p so that the the content of /etc/sysctl.conf gets reloaded and IP Forwarding gets enabled.

25. Now we should edit the network configuration file of Proxmox which we can open it with nano via running nano /etc/network/interfaces and the content should be edited based on your setup.
- the highlighted sections (enp3s0) is the name of the network interface that you should change based on what Proxmox has provided in step 16.
- number 1 and 4 are our first public IPv4 (the IP that we have used for the Proxmox server itself) with its subnet (/32)
- number 2 is the gateway (194.5.98.1).
- number 3 is the DNS servers that we want to use (8.8.8.8 and 8.8.4.4)
- number 5 is the additional public IPv4 that we want to assign to the VM that we will create with Proxmox.

25. After editing the /etc/network/interfaces based on your needs, again press Ctrl + S to save and Ctrl + X to exit from nano and finally run reboot in order to reboot the server so that new configurations gets applied.
26. After reboot, login to the web interface of Proxmox and continue with creation of a VM.

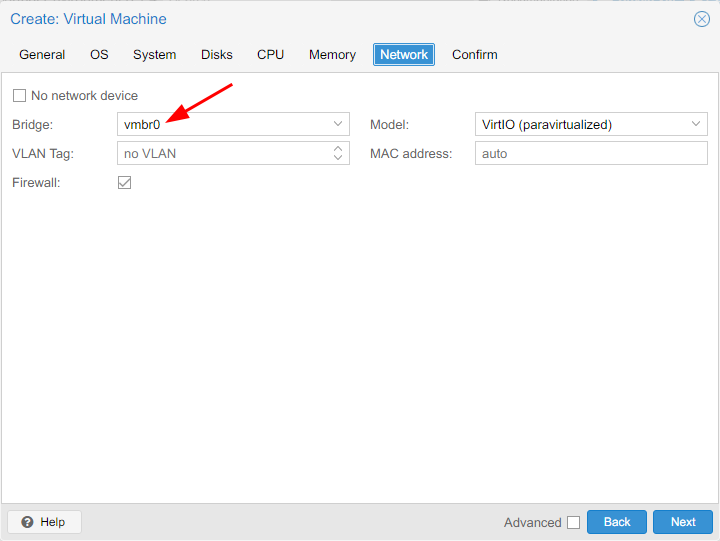
27. Pay attention to the Bridge that you should set in the Network tab which is vmbr0
28. Now you can boot the VM that you have just created and continue the installation/loading until you reach the stage where you can configure the network interface of that VM.
Since there's no DHCP server in the upstream, we have to set the IPs manually (additional public IPv4) and the most important section, the Gateway, should be set to the first public IPv4 (the IP that we have used for the Proxmox server itself).

29. If all have been done properly, the network interface inside the VM can bind to the additional public IPv4 and you can access the external network from inside the VM.
